
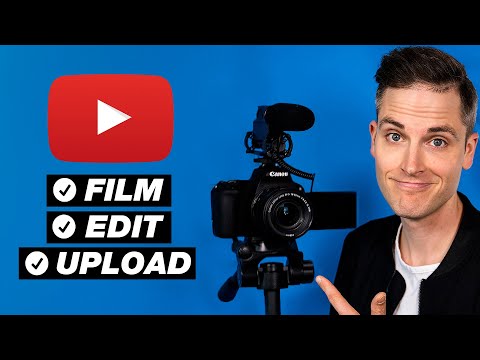
How to Make A YouTube Video for Beginners START to FINISH!
Introduction
- Tutorial on how to film, edit, and upload a YouTube video from scratch.
- Covers gear preparation, camera settings, shooting techniques, editing, and thumbnail creation.
- Hosted by Sean Cannell, author of YouTube Secrets.
“Welcome to the complete tutorial on how to film, edit, and upload a YouTube video from scratch step by step.”
Gear Preparation
- Discusses the gear used in the video and provides a budget-friendly option.
- Main camera: Canon M50 with flip screen and mic input.
- Lens options: 11 to 22 lens for wide shots and vlogging, kit lens, 22mm pancake lens for crisp shots with a blurry background.
- Microphones: Takstar Shotgun mic and Boya mic.
- Tripod: KNF concept tripod.
- Total cost: under $1,000.
“Our main camera for this shoot is the Canon M50. It’s really the best all-around camera for YouTube. We’re using the 11 to 22 lens for wide shots and vlogging, and later on, the 22mm pancake lens for a crisp shot with a blurry background. The Takstar Shotgun mic and Boya mic will be used for audio. We also have the KNF concept tripod for stability. You can pick all this up for a little bit under $1,000.”
Camera Settings
- Explains the settings for video recording.
- Suggests using auto exposure for faster setup and recommends auto white balance and auto picture style for quick editing and export.
- Recommends face focus for vlogging and zone focus for room shots.
- Frame rate options: 24 frames per second for a film look, 29.97 or 30 frames per second for regular videos, and 60 frames per second for slow motion or sports.
- Recommends following the 180-degree rule for shutter speed.
- Suggests using auto ISO to allow the camera to automatically adjust lighting.
“For video recording, it’s best to start with auto exposure, auto white balance, and auto picture style. Face focus is recommended for vlogging, while zone focus can be used for room shots. Frame rate options include 24 frames per second for a film look, 29.97 or 30 frames per second for regular videos, and 60 frames per second for slow motion or sports. Shutter speed should follow the 180-degree rule. Auto ISO is suggested for automatic lighting adjustment.”
Camera Settings for Video Quality
- The 11 to 22 Canon lens is being used, but because the aperture is at four, the video may be a little bit dark.
- The ISO might go up to compensate for the darkness.
- Higher ISOs can affect the image quality and make it more grainy.
- It’s best to keep the ISO as low as possible to maintain high image quality.
“One thing to remember about ISO is that lower is gonna be not as much light being let in, but it’s gonna be a better image quality.”
Mic Settings for Crispy Audio
- The Shotgun mic with +10 db is recommended for vlogging.
- Keeping the mic on manual setting avoids auto gain control, which can introduce noise and hissing in the audio.
- Adjusting the gain to ensure clean audio levels is crucial.
“And the one other thing I’m gonna do here is switch the focus mode from face focus to zone focus.”
Shooting with a Versatile Setup
- The setup includes a camera with a flip screen and a wide-angle lens.
- The Joby tripod allows for vlogging and stable shots.
- This setup is ideal for moving from room to room while shooting a video.
“I love the wide-angle lens especially for like a room tour video because it gets very wide shots.”
Organizing Footage with A-Roll and B-Roll
- A-Roll refers to the base layer of video footage, typically with the person on camera and main narration.
- B-Roll includes additional clips layered on top of the A-Roll.
- Using A-Roll and B-Roll helps in organizing and creating engaging YouTube videos.
“The reason it’s called B-Roll is then it’s any extra clips that we would layer on top of the A-Roll.”
Benefits of Using Different Lenses
- Switching to a lens with a faster aperture, like the 22mm f/2, improves low-light performance and creates a shallow depth of field.
- A faster aperture allows more light into the camera, resulting in better image quality in darker scenes.
“What a faster aperture and faster is the lower number, with an f/2 aperture will do for you is allow the image to be better in lower light, it basically as a wider aperture, it lets more light into the camera and so in these darker scenes.”
Why having the right equipment is important
- Being able to get a blurry background and good audio by using the right camera and microphone setup.
- Audio quality can be affected if too far away from a shotgun mic.
- Need the right equipment to feel ready to create content for YouTube.
“Thanks for coming along with me for a quick tour through the Think Media offices. I just wanted to give you the complete kit that I would use so that I feel ready to create all the content necessary to tell a great story on YouTube.”
Importance of creating a thumbnail
- Many people make the mistake of just pulling a clip from the video for the thumbnail.
- It is recommended to shoot specific thumbnail photography.
- Tips for editing the thumbnail in Photoshop.
“One of the biggest things people miss on YouTube is being like oh shoot, I’m just gonna pull a clip out of the video for the thumbnail. I recommend actually shooting specific thumbnail photography and then I’ve got some tips in Photoshop for editing your thumbnail.”
Tips for making the filming process quicker and more efficient
- Outline your videos and plan out your content ahead of time. This helps in better execution during filming.
- Create a checklist for the filming process.
- Batch shoot videos, shooting more than one video at a time.
“You know, prior planning prevents poor performance, like the more you plan out your content ahead of time, the better it goes when you’re filming it. I think also just having a checklist for your process. Throughout this entire mega video, there’s gonna be a mega list of videos and resources in the description below.”
The choice between 4K and 1080p
- 1080p is still fine for video quality.
- Over 50% of homes in America now have a 4K TV.
- 4K is becoming more mainstream, but it is not necessary.
“The first one is I think 1080p is still fine, I mean, we’re shooting this video in 1080p. Secondly, new information has come out that going into 2020 here in America, over 50% of homes now have a 4k TV in their home […] Do I think you need it? No.”
Recommended approach for creating tutorials
- Shorter intros are recommended as attention spans on YouTube are getting shorter.
- Dive straight into the tutorial, as viewers often already know the content from the title and thumbnail.
- Experiment with different styles of videos to see what works best for your audience.
“So I would recommend actually these days here on Think Media we’re trying to get to the point quicker. Attention spans are getting shorter and shorter on YouTube so if you do just dive straight into it, it’s a lot of time what people are looking for. Maybe they know the title and the thumbnail has described the content, so you can just get into it quickly.”
Considerations for camera choice
- The best camera to start with is the one you already have, like a smartphone.
- Smartphone cameras are great for getting started.
- Using a separate camera has advantages, like saving space on your phone.
- Smartphone-focused video series available.
“The first one is the best camera to start with is always the camera that you already have, which is probably your smartphone. In fact, we have a four-part series here on Think Media where Heather breaks down how to shoot, edit, and upload just with your phone.”
Choosing the Right Equipment for Filming
- Capturing videos and Instagram stories is more efficient by saving the footage separately from your phone
- Shooting videos and capturing in a laptop or computer allows for quicker editing and separate content organization
- The front-facing camera on phones is typically not as good for vlogging compared to forward-facing cameras
- Using a separate camera with good quality and a selfie screen can enhance the content creation process
“There is something powerful about I think a separate camera that can get you good quality that has a nice selfie screen.”
Use the Camera You Have and Don’t Let It Limit You
- The camera you have should not limit you from success on YouTube
- A smartphone or iPad can be used for shooting thumbnails and editing
“The best camera to have is always the camera you do have, punch fear in the face and get started.”
Clean HDMI Output for Live Streaming
- The Canon M50, SL2, and Sony cameras are commonly used for live streaming
- The Cam Link device by Elgato allows you to connect a camera through USB and capture clean HDMI output
- Clean HDMI output is important for a clean image without distractions while live streaming
“The reason you want a clean HDMI output, because if it’s not clean, then maybe on the screen when you’re live streaming, it wouldn’t be a clean image.”
Choosing Between Canon M50 and Sony A6400 for Vlogging
- Canon M50 is more budget-friendly, while Sony A6400 offers 4K and future-proof capabilities
- Choosing between the two comes down to personal preference and needs
“Here’s the thing, in both cases, you’re going to probably have everything that you want.”
Importance of Thumbnails for YouTube Success
- Thumbnails play a significant role in getting views and growing a YouTube channel
- Shooting intentional photos for thumbnails increases the chances of attracting clicks
“One of the biggest mistakes people make is they forget to actually shoot intentional thumbnails.”
Shooting Thumbnails
- Use a tripod and camera timer to shoot thumbnails by yourself.
- Consider using your phone and the camera timer app for convenience.
- When shooting thumbnails as a solo creator, put the camera in selfie mode.
- Adjust camera settings for optimal results: set aperture to the lowest possible value, use ISO auto for perfect lighting.
- Compose the shot by considering where you are looking and the background.
- Emphasize emotion and include your own style in thumbnails.
- Studies have shown that including people’s eyes and emotions in thumbnails can attract viewers.
- Shooting multiple photos gives you more options to choose from during the editing process.
“Usually people in the thumbnails is stronger. On YouTube, tests have shown that if you see people’s eyes, you see emotions on their face, it can really pull you in.”
Composition and Framing
- Consider the rule of thirds for shot composition.
- Fill the frame with the subject and think about the background.
- Place yourself close to the edge of the thumbnail for better framing.
- Experiment with different angles and positions to find the perfect shot.
- Shooting multiple photos gives you more options to choose from.
“And again, I don’t mind having options. So here we go, let’s just do one final one.”
Benefits of Shooting in RAW
- Shooting in RAW allows for more flexibility in editing.
- Adjustments to exposure, white balance, and more can be made in post-processing.
- Shooting in RAW gives you the best quality possible.
- Shooting in large JPEG format is also a simpler option.
“And so that’s another setting I have it on, I’m actually shooting large JPEGs and I’m shooting raw as well.”
Selecting the Best Thumbnail
- Review all the thumbnail options you have captured.
- Look for the perfect emotion or facial expression that attracts attention.
- Choose a thumbnail that highlights your face and eyes.
- Crop or make adjustments to the selected thumbnail if necessary.
- Having multiple options ensures that you have a good choice for editing.
“I really like the eyes looking cause it directs attention to maybe some words that we can put on here.”
Resizing the Canvas and Adjusting the Image
- To resize the canvas and adjust the image to fit a 1080 thumbnail size, press Control + J on a PC that duplicates the layer.
- Use the resolution of 1920 by 1080.
- Maintain the resolution by holding Shift while resizing the image.
- Zoom in with Control plus to make it easier to adjust the image.
“And this is gonna allow me to go to the exact thumbnail size of a 1080 thumbnail.”
Adding Text to the Thumbnail
- Use the text tool in Photoshop to add text to the thumbnail.
- Choose a font that is simple and readable, such as Helvetica New.
- Adjust the font settings, such as making it black and italic.
- Drag a rectangle box to create a background for the text.
“Now, the title of this video, I like planning ahead, if you can research before you press record, is gonna be 10 Cool Home Office Design Ideas.”
Simplifying the Title and Emphasizing the Main Points
- Avoid including every single word from the title in the thumbnail.
- Choose the main points that people are looking for and include them in the thumbnail.
- Duplicate the layer for each word and adjust accordingly.
- Use the Control bracket to arrange the layers.
“But one mistake people make is trying to include every single word in their title and their thumbnail. You don’t need all of them, but sometimes it’s nice to put some words in your thumbnail.”
Ensuring Clarity and Readability
- Prioritize clarity and readability when choosing fonts.
- Avoid using fonts that are too cursive or difficult to read, such as Comic Sans.
- Keep the design simple and easy to understand.
“Your style, I will encourage you of course always have your own style and not that my style is right or wrong, but one priority that I have is clarity. Like I really believe online that if you confuse, you lose, and so I like simple fonts, I like readable fonts.”
Adjusting the Image Brightness and Contrast
- Use the levels adjustment in Photoshop to modify the image’s brightness and contrast.
- Use the sliders to make the image brighter or darker, and more or less contrasty.
- Aim to make the thumbnail pop and stand out.
- Consider adding extra saturation or vibrance to enhance the visual appeal of the thumbnail.
“And levels gives me three sliders over here on the right that will really see, it can make the image brighter, and I can also pull it from this side and make it much more contrasty and make it kind of darker, so what I like to do is really get the thumbnail to pop.”
Final Touches and Saving the Thumbnail
- Consider moving the text away from the edges to avoid interference with the title when viewed online.
- Avoid placing text in the lower right corner where the YouTube time code appears.
- Add additional layers or use the gradient tool to darken edges or make adjustments as desired.
- Save the final thumbnail in the appropriate format and organize it for easy access.
“So now, our final step here is to just go File, Save As in our final format. What I like to do is I keep everything organized on Dropbox by month and that way we can, I can get to it easy for my phone and whatever else.”
Saving and Editing PSD Files
- It’s important to save PSD (Photoshop) files so you can reopen and edit them later if needed.
- After creating a thumbnail, save the Photoshop file and then save it as a JPEG for uploading to YouTube.
“But what I really like to do is save the PSD so I can always reopen it and edit it later if I need to.”
Thumbnail Design Tips
- Thumbnails play a crucial role in attracting clicks, so it’s important to design them well.
- Design at least two thumbnail options for each video and gather feedback from your audience on which one stands out better.
- Consider your preferred branding and style, and also analyze what successful videos in your industry are doing with their thumbnails.
- Keep testing and trying new approaches to find what works best for your channel.
“Sometimes we need to get feedback when it comes to our thumbnails. … That can help you narrow down what people would actually click on.”
Thumbnail Size and Resolution
- The recommended resolution for thumbnails is 1920 by 1080 pixels (1080p).
- Designing in 4K is future-proof, but be aware of YouTube’s file size limit for thumbnails.
- Avoid going smaller than 1080p to maintain the highest quality for sharing on different platforms.
“I make all my thumbnails in 1920 by 1080 resolution, that’s a standard 1080p resolution…it’s what YouTube recommends.”
Getting Feedback on Thumbnails
- Feedback is crucial in determining the effectiveness of your thumbnails.
- Share your alternative thumbnail designs on social media and ask your followers which one they would click on first or which one stands out better.
- Consider joining a Facebook group dedicated to thumbnail feedback to get help from other creators.
- Regularly study your click-through rate in YouTube Studio Beta to see how well your thumbnails are performing.
“Sometimes we need to get feedback when it comes to our thumbnails. … that’s how you stand out.”
Adding Color to Thumbnails
- Use Photoshop or similar tools to add cool colors to your thumbnails.
- Experiment with different styles and colors that align with your branding and the trends in your industry.
- Keep testing and analyzing the click-through rate to find the right style and color combination.
“Besides the tutorial that I just shared… it was kind of a 1-on-1 basic going through Photoshop.”
Using Free Software on Canva.com
- The video discusses how to use free software on can.com.
- There is also a paid version available, but the free version offers trial or limited features.
- A link to another video that goes into detail about using free software on canva.com will be provided in the resource guide.
“And it’s hard to explain in a Q&A like this, I think they’re in some of our advanced trainings that we have in our members areas and whatnot, I do have some deeper dives of how exactly I make the thumbnails of video influencers and THiNK Media, I still do all of that thumbnail design myself.”
Learning Photoshop for Powerful Thumbnails
- The speaker suggests learning Photoshop at a higher skill level to create powerful thumbnails.
- They recommend using resources such as LinkedIn Learning, free YouTube videos, or mini courses on Skillshare to learn Photoshop.
- Learning Photoshop not only helps with designing thumbnails but also with creating graphics for social media, email newsletters, and websites.
“If you go through a couple, take a weekend or take a couple weekends to really go deep in Skillshare or LinkedIn learning on Photoshop and then you’re gonna have the skills needed to not just design powerful thumbnails, but to also design powerful graphics for your business overall.”
Using Text in Thumbnails
- The speaker suggests considering design aesthetics when deciding whether to use text in thumbnails.
- They recommend using as few words as possible (ideally under five) or using emphasized text for better readability.
- However, there are exceptions where text may be necessary for practicality, such as in tutorial or cooking videos to provide instructive information.
“First of all, in my opinion, design aesthetics matter. So if you are using text or not, don’t use too much text, don’t pack the thumbnail so that it’s unreadable, don’t use fonts that are hard to read or confusing or that just disappear on the background, don’t restate your title in text on your thumbnail. But if you are gonna use text, use as few words as possible.”
Updating Thumbnails for Older Videos
- The speaker suggests there can be benefits to updating thumbnails for older videos.
- They share their own experience of updating thumbnails for their best videos, giving them a fresh look and an opportunity to re-promote them.
- While it may not be necessary to update the entire video library, targeting specific videos to refresh and re-promote can make a difference.
“When I was partway into my journey at THiNK Media, I had some early videos that were pretty good content and the thumbnails I just didn’t put any energy into them at all. So once my design skills up leveled a bit and I wanted to kind of refresh the videos, I took like a Saturday morning and I just went back and I updated my best videos, I didn’t do my whole library, I think that might be wasted energy, but there was a few that I wanted to not only update, but then I re promoted them, because then I had a new thumbnail which gave me a new graphic to share on Facebook, to share on Twitter and say, hey, go check out this video.”
Creating Compelling Thumbnails
- Thumbnails should stand out and grab attention.
- Use color and emotion to make your thumbnail pop.
- Keep the image clear and avoid clutter.
“What you want is it to leap off the page.”
Key Elements for Thumbnails
- Stand out from other videos.
- Use color and emotions.
- Less is more, avoid using too many words or elements.
“I think color is a big deal. Doesn’t have to be crazy rainbow colors, but I think some pop of color helps it stand out.”
Importance of Emotion in Thumbnails
- Emotion helps thumbnails stand out and attract clicks.
- Use happy, sad, confused, or dramatic expressions.
- Tie in with the content of the video to create a powerful thumbnail.
“People respond to emotion…happy or sad or confused or suspicious or there’s drama, and you do the scared face and then you talk about the coming doom and gloom.”
The Challenge of Creating Clear Thumbnails
- Tell a story in the thumbnail.
- Avoid showing too much or making it too busy.
- Keep the thumbnail clear and easy to understand.
“If we try to get too many words, too many things…if it’s too messy, if it’s too busy, if you confuse, you lose.”
interprets footage automatically
- Premiere has improved so that it can automatically understand and interpret footage without needing to know the technical details ahead of time.
- Users can simply drop their footage into Premiere and it will automatically interpret it correctly.
“You can just drop your footage in and it will know how to interpret it for you.”
Importing media is the first step
- To begin the video editing process in Premiere, the first step is to import media.
- Users can either import media from the Premiere homepage or drop the media directly onto the sequence placeholder.
“Import media to start, that is our first step.”
Selecting A-Roll and B-Roll clips
- Users can distinguish between A-Roll and B-Roll clips in the timeline.
- A-Roll represents the main video and audio content, while B-Roll consists of additional footage that can be used to supplement the A-Roll.
- By selecting and dragging the clips accordingly, users can arrange the A-Roll and B-Roll in the desired sequence.
“If this is your A-Roll, which is your layer video number one…maybe we wanna pull in some B-Roll, here’s all of our B-Roll clips.”
Trimming and organizing clips in the timeline
- Users can trim and organize clips within the timeline for a smooth video flow.
- Clips can be deleted or rearranged to achieve the desired order.
- Audio can be unlinked from video if necessary.
“I could be talking in the A-Roll here, but then it could show the B-Roll while I’m talking.”
Using hotkeys for faster editing
- Hotkeys can be used to speed up the editing process.
- The “L” button, for example, can be pressed to increase the playback speed.
- Other hotkeys, such as minus and plus, can be used to zoom in and out of the timeline.
“There’s a hotkey called L…ways I go faster is pressing the L button to speed up.”
Trimming and editing the A-Roll
- After organizing the clips in the timeline, users can begin trimming and editing the A-Roll.
- By using the waveform and playback, users can identify where to make cuts and refine the A-Roll.
- Unnecessary sections can be deleted to tighten the video.
“Now I can cut into the video itself…I just work through from left to right basically on the edits.”
Adjusting audio gain
- To maintain consistent audio levels, users can adjust the audio gain.
- In Premiere, the audio gain can be reduced by a specific value, such as minus three, to achieve a quieter audio output.
“So here in Premiere, I’m just gonna go audio gain minus three for now.”
Trimming and refining the A-Roll edit
- Once the A-Roll edit is complete, users can proceed to trim and refine the rest of the A-Roll clips in the timeline.
- This includes trimming clips, deleting unnecessary sections, and ensuring a smooth transition between clips.
“So now you can see what I’m gonna do is go through the rest of the edit of the A-Roll, I’m gonna be just trimming through all of the clips.”
“If it doesn’t add to the story, you might as well cut it out.”
Space bar to start and stop the video
- The space bar can be used to start and stop the video.
- Shortcut: Space bar.
“is space bar to start and stop the video.”
Using shortcuts to speed up and zoom in/out
- Pressing space bar + L can speed up the video.
- Pressing plus (+) and minus (-) can zoom in and out on the video.
“So I can do to space bar + L to speed up and plus and minus to zoom.”
Adding bars and tone for comedic effect
- Adding bars and tone can create a comedic effect in a video.
- Bars and tone can be dragged into the project files in Premiere.
“What I’m gonna do is add a bars and tone. This is gonna add so that it goes into my project files right over here, I can drag it in here.”
Using a comedy beep for a joke
- A quick comedy beep can be added in Premiere as a humorous effect.
- It can be used to reset the viewer’s attention.
“This is my favorite way to add like a quick comedy beep and this is just built right into Premiere.”
Checking progress and layout in the timeline
- The timeline can be used to check the progress and layout of the video.
- The timeline shows different sections of the video, such as intro, hook, and editing progress.
“All right, okay, so for a quick update, you can see on our timeline here we have basically, from the intro, we have from the hook, we have the intro right there, and we’ve gotten through all of this editing so far.”
Adding bars and tone for comedic effect
- Adding bars and tone is a quick way to add a comedic beep into a video.
- This feature is built right into Premiere.
“And then right after I say succulent essentially. That’s a nice succulent, beep.”
Creating an outro using a template in Photoshop
- Photoshop can be used to create an outro for the video.
- Using a template saves time and allows for customization.
“So I’m gonna open up Photoshop. Now I’ve already spent the time building a template which allows me to have the Subscribe button up there.”
Using Epidemic Music for adding background music
- Epidemic Music is a recommended option for adding background music to YouTube videos.
- It offers a variety of genres, beats, and pricing options.
“And if there was one site that I feel like is the best all around for most YouTube creators, it’s Epidemic Music.”
Using waveform for editing music
- The waveform in Premiere can be used to visually locate drops and beats in a song.
- This can help in editing music to match certain sections of the video.
“Remember how we were looking at the waveform, I can see where the drops are based on the waveform visually, right?”
“So my opinion is work backwards from the drop.”
Mixing in an intro song using waveform
- Waveform can help in positioning an intro song in the video.
- Working backwards from the drop can help align the song with the desired timing.
“And so if we want the drop right when the logo hits, I’m going to go minus five again cause it’s coming in a little strong.”
Editing the Audio
- Adjust the audio balance between the music and vocals.
- Right-click on the audio track and select “audio gain”, then set it to minus 18.
- Use waveforms on Premiere to ensure audio levels are not peaking.
- Consider the volume of the music compared to the voice.
- Decrease the music volume if needed to prevent overpowering the vocals.
- Aim for the audience to be able to hear the video clearly.
- Use fades or keyframes to transition between audio sections.
“So I don’t want this music to overpower my vocals.”
Adding Titles and Sound Effects
- Use Legacy Title to create titles in Premiere.
- Place the titles on top of the video track.
- Use a black background and the desired font.
- Consider adding sound effects to enhance specific moments in the video.
- Utilize layers to control the timing and placement of sound effects.
“That’s a sound effect, right? It’s edited in.”
Enhancing Visual Effects
- Use plugins like Impact Push to add motion blur or other visual effects.
- Experiment with different effects to enhance the video’s quality.
- Adjust the effect settings to achieve the desired look.
“It gives you like a motion blur on your animations.”
Exporting the Video
- Prepare the video for export by marking the desired sections.
- Select the appropriate settings for the export, such as resolution and format.
- Follow specific instructions in part four of the series for exporting and uploading to YouTube.
“And so what I’m gonna do is mark out I’m saying that I want everything underneath this to be exported.”
Editing Software Recommendations
- You may only need to build your project once and then drop in the elements you shot for that video.
- Omar from the Think Media Team has a training on video podcasting in Adobe Premiere that demonstrates how to do it quickly.
- Check out the resource guide for the recommended videos from Omar.
“You may only need to build that once and then just drop in the elements that you shot for that video.”
Free PC Video Editing Software
- Blender, Da Vinci Resolve, HitFilm Express are some free PC video editing software options.
- Check Google search results for top recommendations.
- Share any recommendations in the comment section.
“A couple to check out are Blender, Da Vinci Resolve, HitFilm Express, and of course, I’d recommend maybe Google and see what the top recommendations are.”
Ease of Use for Free Video Editing Software
- Recommended software may not be easy to learn.
- iMovie is simple and works well for Mac users.
- Check the comments section for recommendations on user-friendly PC video editing software.
“I don’t know how easy they are really to learn, but I think the best video editing software to start with is iMovie if you can get access to a Mac.”
Classes for Final Cut Pro and Adobe Premiere
- Two recommended classes are LinkedIn Learning and Skillshare.
- Both offer tutorials and training, with free trials available.
- More details can be found in the resource guide.
“The two I’d recommend are LinkedIn Learning or Skillshare. In both cases, there are tutorials and training on each, they both have free trials.”
Tips for Sound Editing
- Always edit with headphones or good studio monitors to monitor audio.
- Pay attention to audio levels and avoid peaking.
- Mix audio based on the voice of your subject, keeping music complimentary and not overpowering.
- Music should add energy and emotion without distracting from the message.
“I definitely recommend first off to always edit with headphones or good studio monitors so you can be monitoring your audio because audio is one of the most important parts of video.”
Time Lapse and Split Screen
- A video on time lapses will be provided in the resource guide.
- For split screen, search for tutorials specific to your video editing software.
- Consider deeper training from LinkedIn Learning or Skillshare.
“Split screen is gonna depend on your video editing software, and so for specific tips like that, without the time in this Q&A to go into it, I encourage you to do that search.”
Exporting a Video from Adobe Premiere and Uploading to YouTube
- Sean will show the viewers how to export a video from Adobe Premiere and upload it on YouTube.
“Plus, I’m gonna show you exactly how I export a video from Adobe Premiere and upload it on YouTube, coming up.”
Introduction to the Best Export Settings
- Sean introduces the topic of the best export settings for YouTube videos.
- He mentions that this video is part of a four-part series on shooting YouTube videos with a camera, doing thumbnails, editing, and export settings.
- Sean encourages viewers to watch the other videos in the series.
“And right now we’re in the middle of a four-part series about how to shoot a YouTube video with a camera like the M50 or similar DSLR and mirrorless camera, how to do thumbnails, how to edit, and now the best export settings.” “So if you actually wanna watch one of the other videos in the series, you can click or zap the YouTube card or I’ll put a link to the whole playlist in the description below.”
Using YouTube’s Recommended Upload Encoding Settings
- Sean explains that YouTube provides recommended upload encoding settings for the best video quality.
- He mentions that YouTube recommends using the MP4 container format, H.264 video codec, and specific frame rates and bit rates.
- Sean emphasizes the importance of following these settings to ensure optimal video quality on YouTube.
“Well, the cool thing is YouTube tells us it’s recommended upload encoding settings.” “Here’s the thing, you don’t need to understand it, just use it as a checklist, right?”
Key Considerations for Video Codec and Frame Rate
- Sean discusses the importance of maintaining consistent frame rates throughout the entire video creation process.
- He advises matching the frame rate used during shooting, editing, and exporting.
- Sean highlights the consequences of using different frame rates, such as resulting in sketchy or weird-looking videos.
“Because here’s the thing, if you remember back to part one in the series, and if you haven’t watched the full series, again, check it out.” “If you start in 30 frames, you wanna edit in a 30 frames project, and then you wanna export in 30 frames a second as well.” “And sometimes when the video looks sketchy or weird or there’s weird motion, it’s because something was done wrong, like if you shot it in 30 but export it in 24, it might not look right.”
Optimizing Bit Rate for YouTube Uploads
- Sean explains the concept of bit rate and its impact on file size and video quality.
- He mentions that YouTube compresses videos, so it’s unnecessary to export large file sizes.
- Sean suggests finding the balance between file size and video quality by following YouTube’s recommended bit rates.
“Now, when it comes to YouTube, a big mistake people make is they export super large file sizes, not necessarily realizing that YouTube is gonna compress it anyways.” “So when we toggle bit rate, what we want is to actually make the file size essentially the minimum amount of file size that we can have in our software.”
Applying YouTube’s Bit Rate Recommendations in Adobe Premiere
- Sean demonstrates how to export a video using Adobe Premiere and adjust the bit rate for optimal upload to YouTube.
- He selects the H.264 format and matches the source preset.
- Sean highlights the option to adjust the bit rate to match YouTube’s recommended settings.
“I’m gonna go to File, Export, and I’m gonna say media.” “And then the preset it says match source which is a high bit rate.” “But what I can do down here is there it is, see there’s 10 right there and here’s what I like to do, I take the maximum bit rate, I just max that out as high as it goes.”
“The cool thing is YouTube tells us it’s recommended upload encoding settings.”
Exporting the Video
- The goal is to have the leanest export possible since YouTube will reduce the video quality anyway.
- Audio quality should be ensured as well for a good listening experience.
- The export settings should be reviewed to make sure they meet the desired quality criteria.
- For stereo audio, the bit rate should be set to 384 kilobytes per second and for mono audio, it should be 128 kilobytes per second.
- A bit rate of 320 is recommended for audio, which is higher than what is typically found in Spotify or mp3 downloads.
“So if we wanted the leanest export possible, knowing that there’s really no reason to put out a higher quality than this cause YouTube’s gonna make it 10 megabytes per second, then we’re basically good to go with just that.”
Exporting videos
- Factors that can affect exporting videos include software, video file size, and video codec.
- Some software, like Shotcut, may be slower when exporting videos.
- 4k videos can take longer to export than 1080p.
- The video codec used can also slow down exporting.
“There’s a lot of factors, first of all your software, I don’t know much about Shotcut, that’s another free software recommendation by the way Think Media, but sometimes the software itself might be slower when exporting videos, that doesn’t probably explain the discrepancy but that’s one thing to consider.”
Factors affecting export performance
- The file format itself can slow down the export process.
- Adding multiple layers of clips, B-Roll, or effects can also slow down exporting.
- Making adjustments like blurring or color grading can contribute to slower exports.
“Next, if you stack different layers of clips on top of each other, if you’ve got different B-Roll or effects will slow down the export. If you make something blurry or you add color grading, all of that can slow down the export as well.”
Considerations for faster exports
- Test and experiment to find the most efficient export settings.
- Factors to consider include video workflow, file size, codec, and the capabilities of your machine.
- Upgrading to a faster machine can improve export speed.
- Changing software may also lead to faster exports.
“When it comes to exporting, you really just need to test and if you wanna speed exporting up, think about everything I just mentioned in terms of your video workflow, the file size, the codec, think about investing in a faster machine eventually if you want faster exports, and then think about your software itself, just changing your software could lead to a faster export.”
Uploading in higher resolution
- Uploading a video in a higher resolution than it was shot in can have advantages, such as higher bitrate and improved quality.
- YouTube provides a higher bitrate for larger files, so uploading in 4k can enhance the quality of lower resolution videos.
- It can be a hack to make YouTube believe the video is 4k when it’s actually 1080p processed to 4k.
“One reason why is YouTube will actually give you a higher bitrate, meaning theoretically, and even truthfully, your 1080 will be better in 1080 and even in 4k if you export it in 4k when you upload it to YouTube.”
Options in Adobe for YouTube exports
- Adobe provides export options specifically tailored for YouTube, making it easy to select the appropriate settings.
- Users can choose predefined export settings for 720p, 1080p, or 4k, which should yield good results.
- Alternatively, users can follow custom export settings, like the ones shared in the video, which are based on YouTube’s recommended settings.
“However, in the video I just showed, all the settings that I did, if you wanna follow those step by step in Premiere, then those are really good as well, they’re based on some of my other research and just kind of coming up with the ideal export settings based off of YouTube’s recommended settings.”
Hard Drives and Storage Options
- Multiple hard drives are used to store and backup video footage.
- They have different purposes, such as storing original and exported footage.
- Network Attached Storage (NAS) is used for collective backed up footage.
- Dropbox is used for storing various files, but not necessarily final exports.
“We got a Dropbox, we got a lot of stuff on there as well but not necessarily those final exports.”
Recommended Hard Drives
- Have a working drive for editing, such as the Samsung SDs that are light and fast.
- Use external backup drives for redundancy, like a Western Digital basic drive.
“You know, if we edit on a laptop, we really love the Samsung SDs that are light, they’re fast, and you can just plug them right into USB C or the new Thunderbolt PC, they’re really fast as well.”
Importance of Redundancy
- Having multiple copies of footage is crucial to prevent loss.
- If a hard drive fails, the footage would be protected if it is backed up elsewhere.
“And then eventually you want even more redundancy meaning if it’s only in one place, it’s no place. If you got one, you got zero.”
YouTube Tags, Names, and Descriptions
- There are various videos and resources available to learn about tag optimization and video descriptions.
- A recommended resource is a free one-hour YouTube web class at thinkmasterclass.com by Think Media.
“Well Domingo, that is a great question, we’ll link in the resource guide some of the best videos we recommend here THiNK Media, check those out.”
Video Resolution – 1080p vs 4K
- There is a substantial difference in sharpness and detail between 1080p and 4K.
- 4K footage offers a higher level of visual quality and crispness.
- Consider the viewing platforms and devices your audience uses.
“There is a substantial difference, I mean 4k when we shoot with our A73 Sony camera… it’s crispy, it’s beautiful.”
Speed and Practicality of 4K
- Editing and exporting 4K footage takes longer due to the larger file sizes.
- Uploading and transforming 4K videos also requires more time.
- Consider the speed of your internet connection and the practicality for your specific situation.
“And in 2020 and beyond, speed matters big time for building your brand, building your channel.”
Considerations for 4K Workflow
- A fast 4K workflow requires sufficient assets, including gear, computer, and software.
- If you don’t have the necessary assets yet, stick with 1080p and upgrade as you go.
- Building your brand and channel requires balancing quality and quantity.
“And so think about if you’ve got the assets to support a fast 4k workflow, and if you don’t, you might wanna stick with 1080.”
Reasons for 4K Taking Longer
- 4K takes longer to export and process due to its larger file size.
- The editing and uploading process can be slower compared to working with 1080p footage.
“Yeah Linz, the reason 4k takes so long to export and do everything is because as we just mentioned, it’s so much bigger, it’s four times bigger than 1080p.”
“The mega THiNK Media, how to shoot, edit, upload video has reached part four. But guess what? We’re not done yet.”
How to Get More Views on YouTube
- There are three specific tips mentioned in the video for getting more views on YouTube.
- These tips will go into more depth on how to come up with good video ideas and effectively increase views.
- To learn more, click or tap the YouTube card provided in the video.
“There’s three specific tips for how to come up with good video ideas, get more views, that will go deeper into the content that you just learned, so click or tap the YouTube card to check that out.”